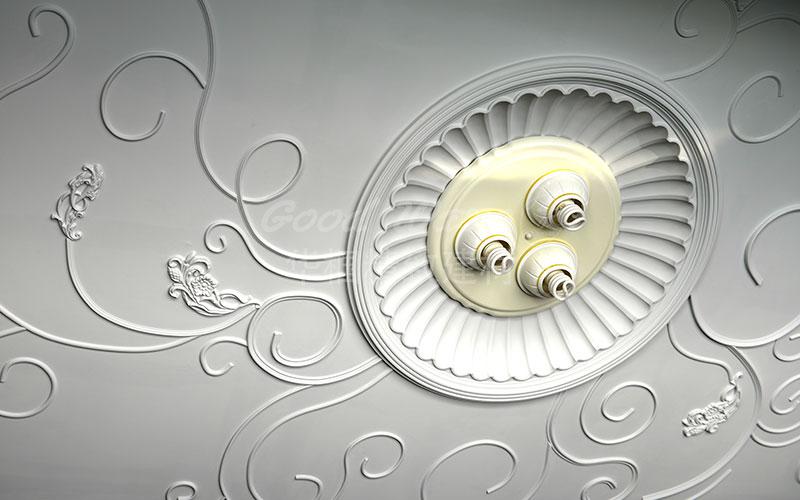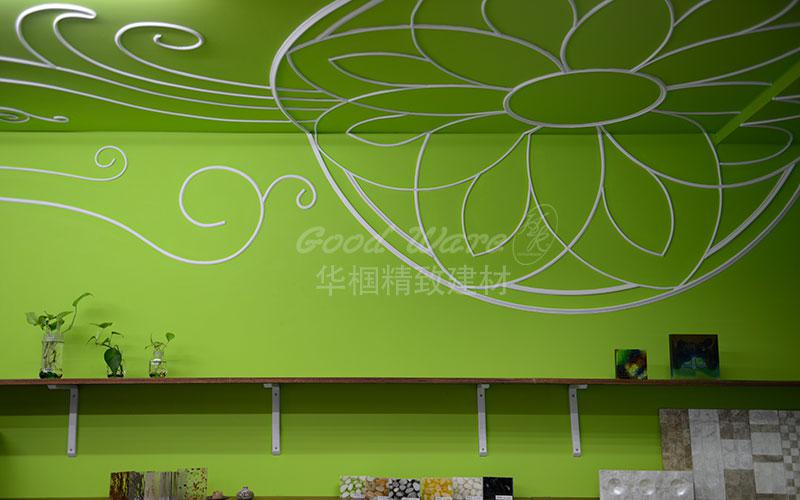
Let’s see how to DIY ceiling tile sheets installation? The pu ceiling tile sheets is popular for 3D effect. Actually, wants to make stereo effect are not simple in the days before. If we can’t design and construct well, it can affect the height of whole space, which gives a more depressive feeling to people. But now, we can use “stereo ceiling” to undertake adornment directly, which can make full use of its stereo characteristic, and model the visual effect that gives 3d. At the same time, the arrangement and combination of different styles is skillfully matched with all kinds of lines, girders, walls and so on, which can also create a different space atmosphere.
So, how do we do that? We’ll show them all as follows.
1.Materials and tools for pu ceiling tile sheets installation
|
Measuring tool |
A tape measure, square, Laser level |
|
Pneumatic tools |
Air compressor, The steel nail gun, Mosquito nail gun |
|
Paint tools |
white blending paint, Paint brush |
|
Cutting tools |
Table saw (table saw), Or saw |
|
other |
White gluing, Super glue, cutter, Steel nail of all sizes, Mosquito nail of all sizes, Various types of sandpaper |
2.pu ceiling tile sheets installation methods and processes
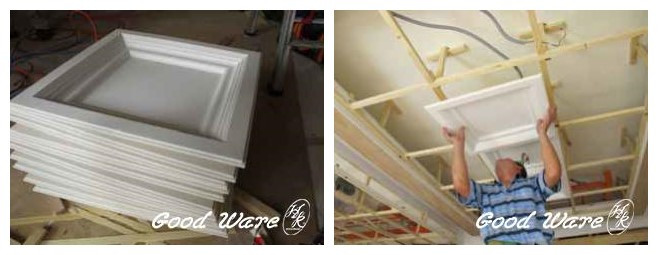
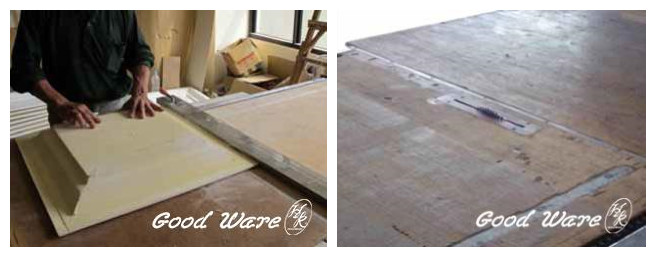
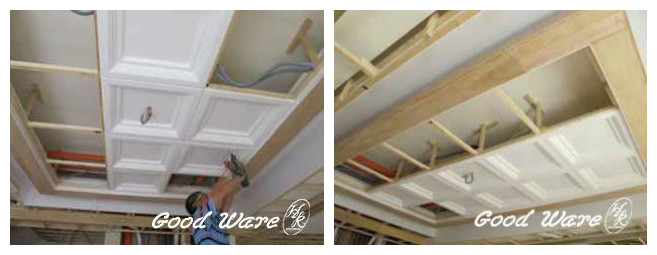
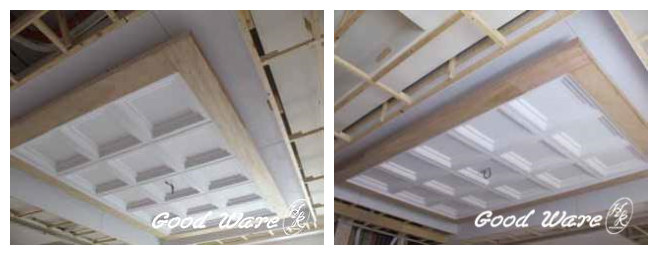
This is an example of pu ceiling tile sheets installation. Firstly, we took the installation of a 3-by-5-pane ceiling skeleton, and prepare 15 three-dimensional ceiling products (wr-8100), which are expected to be installed on the finished ceiling wood skeleton. Then, we should measure the items, and compare the size of the product and skeleton square to know whether it is consistent. If some mistakes are here, we need to adjust them again.

As shown in figure 3, the pu ceiling tile sheets installation sequence starts from the second column. After that, the installation sequence is followed by the first or third column. Whay is more, the middle row of a single column is installed first, the next step is installed left and right in sequence. In general, the installation order is from inside to outside. The purpose is to be able to make each three-dimensional ceiling products be aligned, flat.
For example, in the second column, the installation sequence is the third line, the second line, the fourth line, the first line and the fifth line.
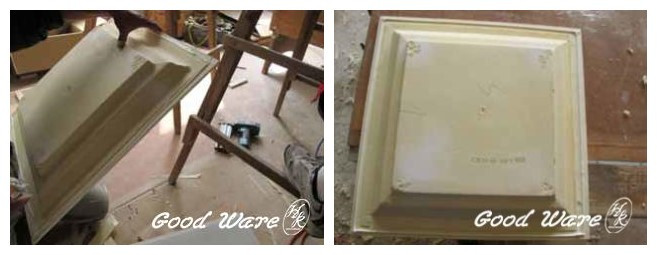
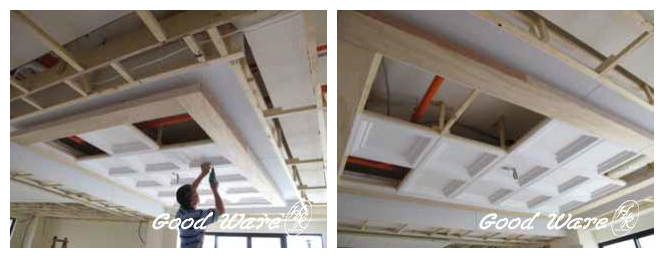
If the size is suitable, it can be installed directly. You can apply nail-free or white adhesive along the four sides of the back of the product.
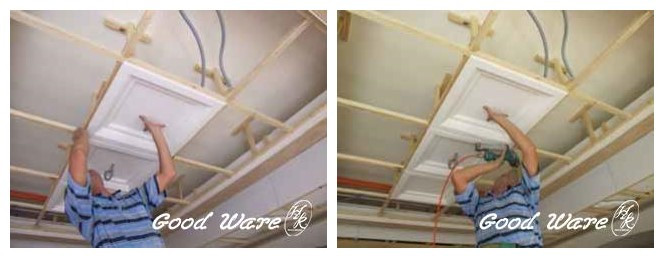
After applying the adhesive, we should install the PU ceiling tile sheets into the corresponding skeleton square. Then we need squeeze them so that the PU ceiling can fully fit with the skeleton square. Finally, we should fix it with the nail gun on the four corners.
In order to increase support, it necessary to reinforce the four edges of the product. As shown in the picture. We should install the “middle row” of the “middle column” firstly, then install it to the left and right.
The installation steps for each vertical ceiling are the same as above. At the beginning, we compare the size of pu ceiling with the skeleton grid. If any mistake is found between the product and the skeleton grid, we need make a mark for cutting.
The next step is to prepare the sawhorse table, which can help us cut off the excess part according to the marks.Then, the height of the sawhorse table can be adjusted according to the actual situation. For example, if the height of the saw blade is adjusted to about 3mm, the height of the saw blade can be adjusted according to the actual situation. Meanwhile, the same edge can be grooved to make the l-shaped groove as before.
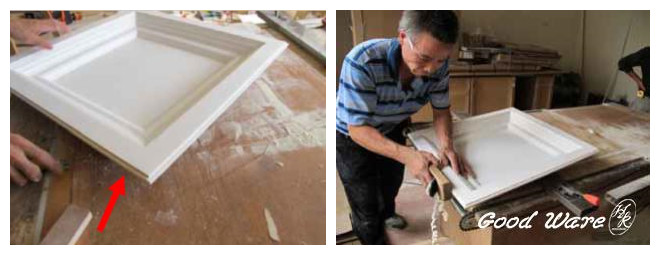
Next, we can use the art cutter to carefully trim the excess part to make it smooth.
The groove design (where the red arrow is indicated in the picture) was originally designed to make the product set up on a light steel frame easily, but it was to ensure overall consistency and aesthetics that we re-made here. Generally speaking, the groove design did nothing. Finally, we need to use the planer to adjust and sharpen the side edge.
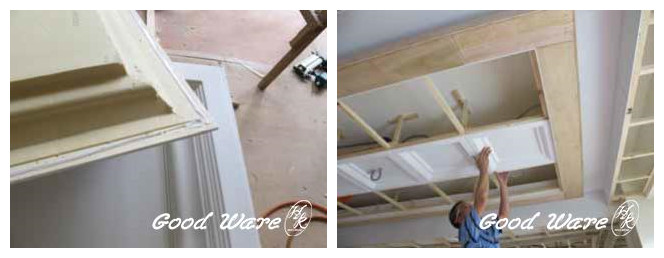
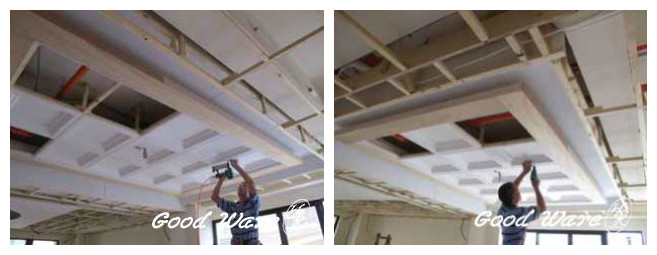
The four edges on the back of the product need to be covered with nail-free or white pu adhesive, and the product should be installed in the skeleton square. Then, we need to press them to make them fit. Next, the four corners of the product need to be hammered with a nail, and the four edges need to be hammered with a nail for reinforcement. The adhesive is the main connecting material between the product and the ceiling skeleton, and the nail is used as the auxiliary material to strengthen the combination of the product and the skeleton.
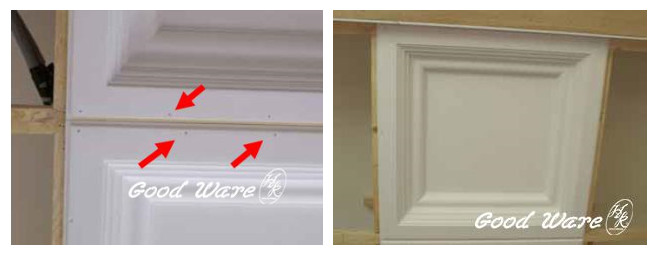
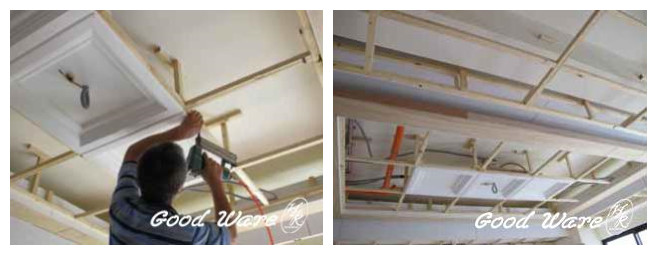
This picture is a close photo of the upper stitching, where 30mm nails is used for pu ceiling construction. The single side of the product needs about 3~5 nails, which can be adjusted according to the actual situation.
As shown pu ceiling installation in this picture, after the middle column is installed, the right column can be installed. A hole is dug in the center of the vertical ceiling, which is used to facilitate the installation of wires and other wiring.
The construction method of the remaining products is the same as above. Repeat the above steps until all is completed.
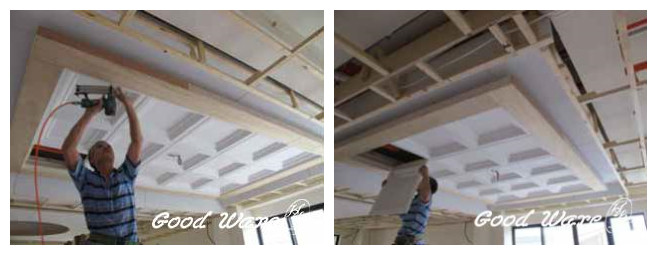
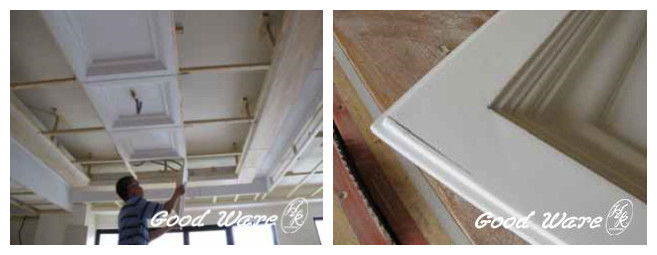
The final step is installing the corner of two stereo ceilings.
3. Points for attention in pu ceiling tile sheets installation
A. The needle is printed with the direction of the arrow. Please install the arrow direction forward. Otherwise, it will be easy to wear the nail gun and hit the needle.
B. The overflow of silica gel, white glue or nail-free glue can be wiped with wet cloth.
C. Adjusting the spray gun
- The upper part of the spray gun controls the opening size of the spray nozzle, the middle part is the amount of paint, and below part is the air flow control.
- When we adjust the spray gun, the best order is air volume control (lower knob), spray nozzle (upper knob), and the amount of paint (middle knob).
- At the beginning, it is necessary to protect the project well, because spray paint is easy to pollute the spot. If we do not protect it, some embarrassed things will occur. For example, the items that have already decorated such as wooden ark, metope, which can have the paint dot of fine particle form.
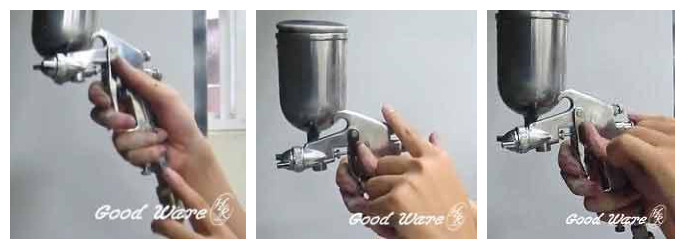
air volume control (lower knob) spray nozzle (upper knob) amount of paint (middle knob)
The above is the pu ceiling tile sheets installation processes and method. If you want to know more about the ceiling design, please search “ceiling” on this website.